Showing posts with label new this month. Show all posts

4.15.2014

New this month: Homemade shower cleaner

Please note that LiRB uses Amazon Affiliate links

Well, I promise I've actually been sticking with the "new this month" projects, even if I can't remember to write them up! This month, I tried a cleaning idea instead of a kitchen idea, and I'm so glad I did.

homemade shower cleaner- diy

I've seen this shower cleaner on Pinterest a number of times. I always thought it was a great idea, but just hadn't ever given it a try. Well, let me tell you, it definitely works. And it's ridiculously simple.

All you need is a soap dispensing dish scrubber, Dawn, and vinegar. Really, that's it. There are different kinds of scrubbers out there, and I chose to go with one that had a softer, sponge like top instead of the bristly brush kind.

Fill the dispenser with nearly even amounts of Dawn and vinegar and shake to combine. I filled the dispenser a little more than halfway with vinegar. You may need to add a little more vinegar after a few uses.

Be careful when you fill it up. Add the Dawn first, as it's much less likely to leak out the sponge part of the scrubber. I found that out the hard way. So, dish soap then vinegar.

I've been using this in the shower for about six weeks now. I only scrub after every two or three showers and it is definitely keeping the shower tile and floor sparkly clean. It's easy to do and only takes a couple extra minutes. Plus, you're already in the shower, so it's not extra time you have to set aside for cleaning. That's a win in my book.

Have you tried any cleaning recipes or tricks you've found on Pinterest? I'd love to find some more good ones!


Linked up at Julie is Coco and Cocoa.


3.13.2014

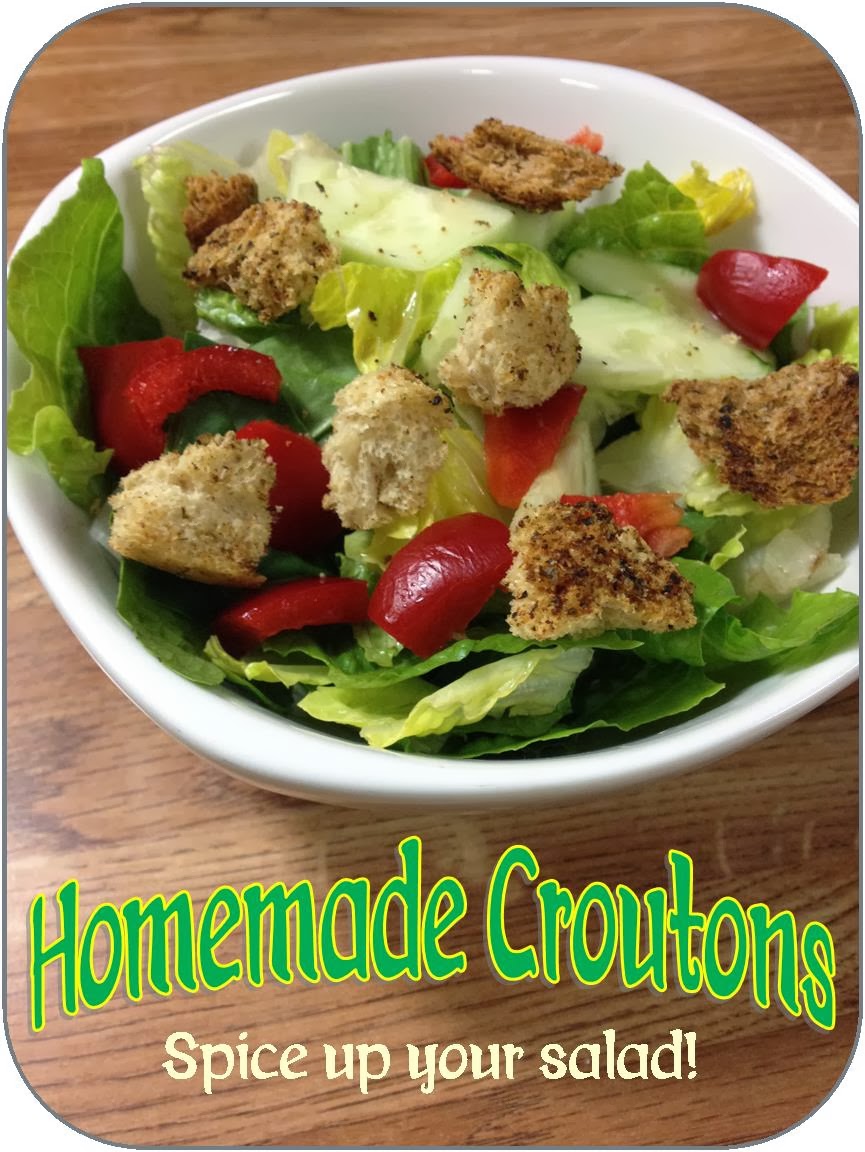
New this month: Homemade Croutons

Well, I'm a little behind in posting the "New This Month" feature for February. I just haven't had time to edit pictures and post. On top of work being quite busy lately, Doug had a nasty cold and then I caught it. Thankfully Phee seems to have completely missed it.


So, I made these croutons right at the end of February. They are extra crunchy and very tasty. I like to snack on a handful of them just as they are! The crunch is very satisfying. 

I used to make these years ago. I fell out of the habit because we don't usually put extras on our salads. But, when you have leftover buns and the ends of a loaf of bread sitting on your counter at the same time, you might as well make a tasty treat!

Homemade Italian Croutons (Weight Watchers = 1PP per serving)
(makes 10 servings)

Ingredients
  • 5 slices of bread (ends of a loaf, leftover buns, pretty much whatever you've got)
  • olive oil cooking spray
  • Italian seasoning
  • black pepper
  • garlic powder
  • celery salt
Directions
  1. Tear or cut your bread into small pieces. 
  2. Spread them out in one or more baking pans. 
  3. Spray with olive oil cooking spray. 
  4. Sprinkle with Italian seasoning, garlic powder, black pepper, and celery salt. 
  5. Mix well. 
  6. Bake at 350 for 20-30 minutes, until crispy. 
I, of course, didn't measure a single thing.  How much seasoning you use entirely depends on how much bread you have and how much flavor you want on your croutons.  I sprinkle liberally with Italian seasoning and pepper, and then add just a dash of garlic and celery salt.  Play with the ratios until you find one that you love!

Do you use croutons on your salads normally?  Or do you have a different "extra" that you prefer?


Linked up at  The Recipe Critic, Heather's French Press, Nessa Makes, Bloom Designs, P is for Preschooler, Sparkles & a Stove, Nancherrow, SITS Girls, Just Us Four, The Grant Life.

1.31.2014

New this month: Homemade Wheat Thin Crackers

One of my goals for this year is to make something new every month: a cleaner, a pantry staple, a snack we love but usually purchase, etc.  Time was running out this month and I still hadn't thought of something I wanted to try.  Perusing my Pinterest boards one day, I came across a homemade wheat thin cracker recipe on my snack board.  I love crackers.  I love Wheat Thins. I love them plain, with cheese, with dip, with Laughing Cow, with cream cheese and jam... pretty much anything is fair game with Wheat Thins.


The recipe is easy and I had everything on hand.  Phee was more than happy to hop into the kitchen to help mix these up.  She had so much fun!  With her help, it took about 40 minutes or so to mix these up, roll them out, and bake them.  By myself it would have probably only taken about 25-30 minutes.

You can find the recipe at The Green Life Pages.  I didn't follow it exactly; I never do.

Homemade Wheat Thin Crackers (makes 8 8-crackers servings)
Weight Watchers: 3PP per serving
Ingredients
  • 1 1/4 cups whole wheat flour
  • 1 1/2 tablespoons sugar
  • 1/2 teaspoon salt (I would up this to 3/4 teaspoon)
  • 1/4 teaspoon paprika
  • 4 tablespoons butter
  • 1/4 cup + 2 tbsp water (or a tiny bit more if dough is too dry)
  • salt (and pepper) for sprinkling on top, if you like

Directions
  1. Preheat oven to 400 F. Line two baking sheets with parchment paper.
  2. In a large bowl, whisk together the dry ingredients.
  3. With a pastry blender (or two forks), cut the butter into the flour mixture until crumbly.
  4. Add the wet ingredients and stir the mixture until it comes together.  If it appears dry add a touch of water.
  5. Divide the dough in half. On a floured surface or a non-stick mat, roll out one half of the dough very thin (1/16th inch). Using a pizza cutter, cut into whatever shape you desire. Using a spatula, place the crackers on the prepared baking sheet.  Sprinkle with more salt, or pepper, if desired.
  6. Bake for 8-10 minutes, watching closely. Halfway through baking rotate the pan to ensure even baking.  
Cool completely and store in an airtight container. This recipe makes about 64 crackers.


Be sure to roll the dough out very thinly- thinner than you think you should.  The thinnest crackers taste the most like real Wheat Thins. Those that were slightly thicker turned out crunchy, but also slightly chewy at the same time.  They aren't bad at all, just not as crispy as you might want.

Our crackers turned out beautifully.  I don't think they're quite salty enough, so, as I noted in the ingredient list, I'd up the salt a little bit.  I sprinkled salt on top of one tray or crackers and salt and pepper on the second tray.  Both are delicious!

What's your favorite cracker topping?


Linked up at Just Us Four, Homesteading Hippy.
Related Posts Plugin for WordPress, Blogger...